


Description
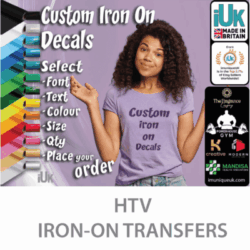
DIY Iron on horse decal for T Shirts, show jumping with female rider, personalised easy to use HTV Heat Transfer Vinyl with easy to follow instructions and customer support included. Your iron-on design is attached to a heat proof, transparent sheet for easy placement. All you need is a garment and domestic iron. You can create the perfect gift for birthdays. A gift for Fathers Day a fun gift for dad, new unique gift for him. A fun gift for her, why not make a gift for mum, or your son, daughter a gift for her.
Each decal has a transfer sheet attached to aid placement. A simple instruction sheet will be supplied. Should you have any issues fitting and need further advice, please contact me via Etsy messenger.
Thank you for purchasing a HTV decal from imuniqueUK, I have included some instructions to assist. I started this craft using an household iron for all my heat transfers with very good results. As things progresses into a business I now use a dedicated Clam Heat Press.
Supplied
..
HTV decal with sample strips for testing if required (recommended).
I have cut your decal using ‘Cricut everyday iron-on’ Heat Transfer Vinyl (HTV). These instructions are a combination of my own experiences combined with instructions copied from the ‘Cricut’ website.
If in doubt please ask me via Etsy messenger, email, or ring me (Glen) on 07958 967236.
Preparation
1. Pre-wash fabric base materials without fabric softener to pre-shrink and remove chemicals that may prohibit strong adhesion.
2. Recommended: To verify cut setting, perform a test cut using a small basic shape.
3. Recommended: To verify application setting, apply test cut in an inconspicuous area on the base material.
4. Find your pressing surface. If it’s firm, flat, and around waist high, you’re golden. Be sure to avoid flimsy ironing boards. Use your iron on a firm surface like a table or the floor.
5. Preheat base material.
6. Place the cut design on the base material with the shiny liner side up. Apply heat as instructed (see Note: below).
7. Flip the base material over and apply heat to the back of the design as instructed.
8. Use a cool peel to remove the liner.
Note: If using a HOUSEHOLD IRON, use the Cotton/Linen setting (generally the highest temperature setting). Make sure the steam setting is OFF. Preheat the application area of your base material for 10-15 seconds. Place the weeded image, liner side up (shiny side up), onto the preheated material. Apply medium to firm pressure with the iron for 25-30 seconds. Flip the material over and apply medium to firm pressure with the iron to the back of the material for an additional 25-30 seconds. Use a cool peel to remove the liner.
Care
• Wait 24 hours before washing embellished item.
• For longest life, wash and dry the embellished item inside-out.
• If areas of Iron-On material lift after washing, simply follow the complete application instructions to reapply.
What is “Peel”?
“Peel” refers to removing the clear iron-on liner after applying iron-on material to your project surface.
Cool Peel: Allow to cool completely before removing liner. Removing liner while still hot or warm may prevent your iron-on image from properly adhering to your material.
Warm Peel: Remove liner while still warm to the touch, but not hot. Letting it cool completely may prevent your iron-on image from properly adhering to your material.
At https://www.imuniqueuk.com, there will be an instructional video to assist the application.
Click here https://www.etsy.com/uk/shop/imuniqueUK to see the full range of my products.
Check out my Instagram sneaky peaks @ https://www.instagram.com/imuniqueuk/
Follow on Facebook https://www.facebook.com/imuniqueUK


Reviews
There are no reviews yet